What are forms and when and why do we use them?
Streamlit forms is a feature that allows you to create interactive web forms in your Streamlit apps. These forms enable you to collect user input through different widgets such as textboxes, selects, checkboxes, and more. When a user submits a form, Streamlit automatically captures the input values and makes them available to your Python code.
Using Streamlit forms is simple. You can define the form boundaries with st.form() and add widgets within it. Streamlit provides a variety of input components that make it easy for users to enter information such as text input, number input, and so on. This integration with Python eliminates the need for manual form handling.
Streamlit forms offer customization options to improve the user experience. You can add labels, default values, and tooltips to guide users. Additionally, you can control a form’s layout and style to match your app’s design.
Form submission is always triggered by a submit button, allowing you to capture user input and perform actions based on it.
To summarize, forms are groups of widgets, and we can run different groups of forms independently of one another. Let’s write some simple code to show this feature:
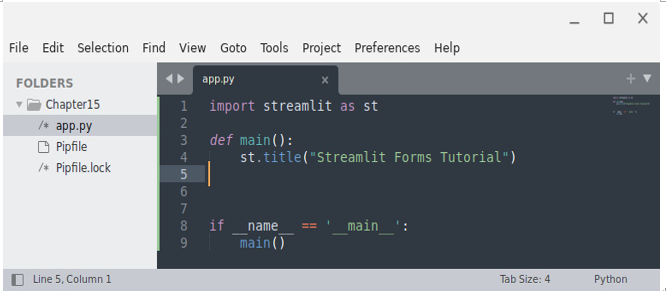
Figure 15.1: Starting point for forms
The preceding code is extremely simple: after importing streamlit, we just print a title on the screen. Here is the result:
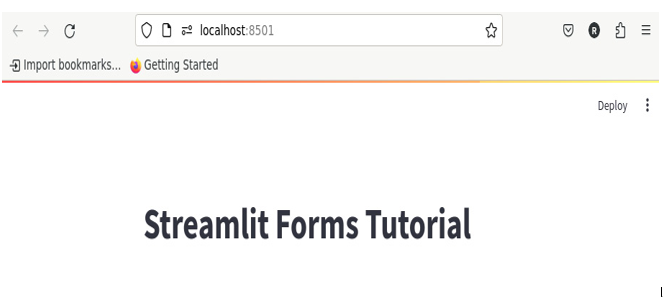
Figure 15.2: Starting point from the browser perspective
To introduce forms in our code, we essentially have two approaches. Let’s take a look at them one by one.
The context manager approach
The first way to introduce forms in our code is the context manager approach, an elegant approach that uses the with instruction. The with instruction makes it possible to declare the form just at the beginning of the code block (on line 8 in Figure 15.3) and then just use instructions in the usual way, typing st. with the name of the widget. So, write this code:
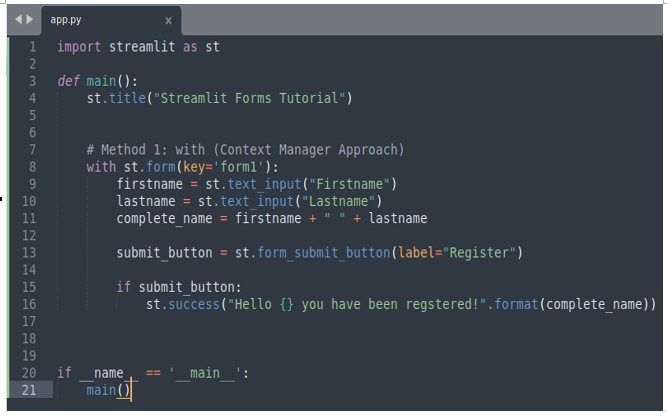
Figure 15.3: The context manager approach
Here’s a breakdown of the code shown in Figure 15.3:
- On line 8, we created a form leveraging the with instruction. Please note that the only argument of the form is its key, and it can be any kind of text.
- After that, on lines 9 and 10, we inserted a couple of widgets in our new form, specifically a couple of text_input instances used to save the first name and last name of a hypothetical user.
- On line 11, we just merged the first and last names.
- Line 13 is very important because each form needs to be activated by a submit button, which must be created using the form_submit_button method. In this case, as an argument, we use the label to be visualized in the form.
- Finally, on line 15, we used an if clause to double-check whether the button has been pushed; if it has, we print a success message.
This is the result in the browser:
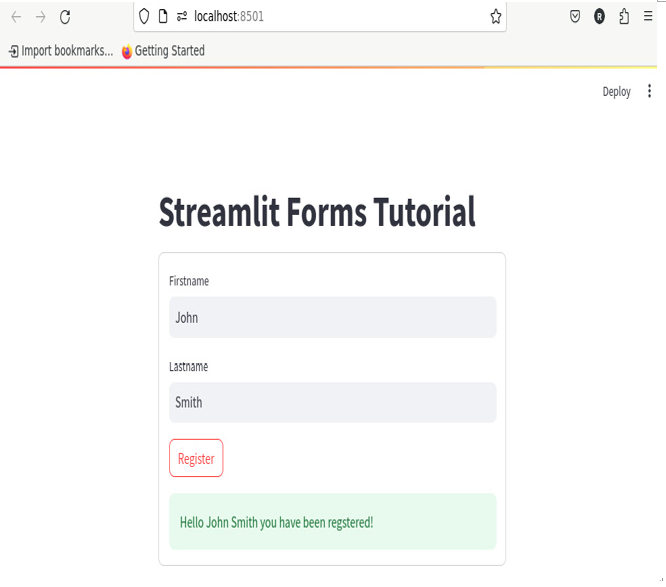
Figure 15.4: Result using the context manager approach in the browser
When we click on the Register button, a greeting message appears on the screen. Please note that this message is inside the form box: the gray box containing the two text_input instances and the button.
To keep the message out of the form, we can slightly change the code, as shown in the following figure:
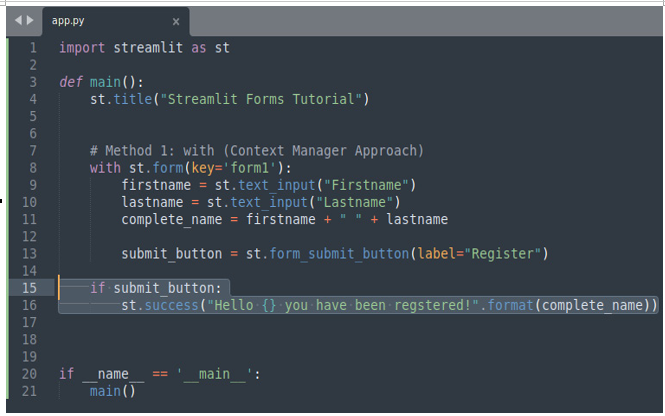
Figure 15.5: Keeping the success message outside the form
Now, the if clause indentation has been changed to be exactly below the with instruction, which means below the form – that is, outside its code block. This is the result:
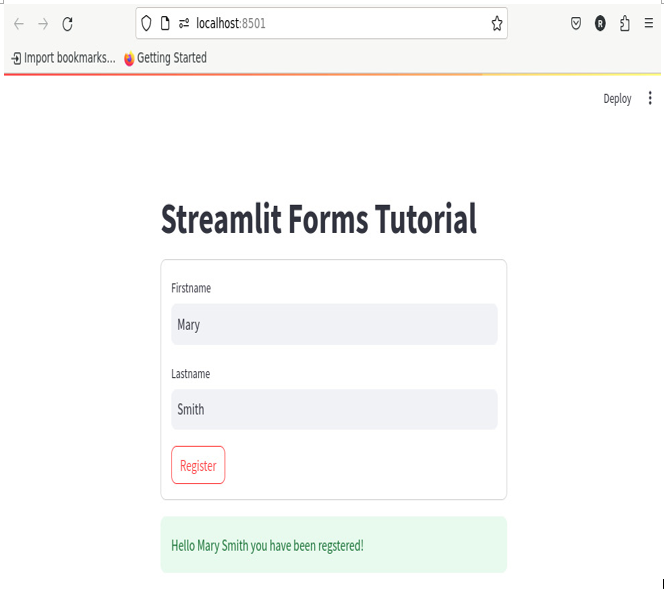
Figure 15.6: A different position for the greeting message
Let’s now see the second approach, a classic one, used to introduce forms.


