Understanding new features related to deep customization
For this chapter, no new packages are needed – all we need is Streamlit. Let’s start by creating a new empty Python file; as usual, you can call it app.py. Then, open the IDE. We can start coding by just importing streamlit and adding a title both in the sidebar and in the main part of the web application, as shown in Figure 14.1:
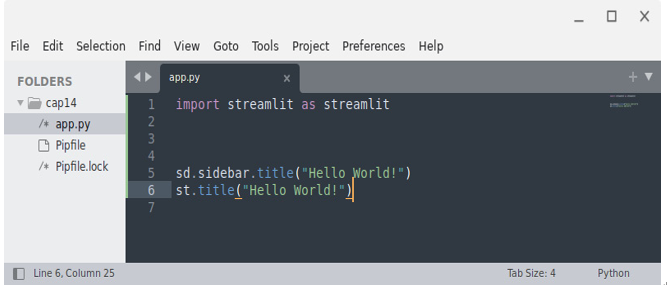
Figure 14.1: The starting code
Launching the application opens the browser on localhost at port 8501 and, as usual, we get something like this:
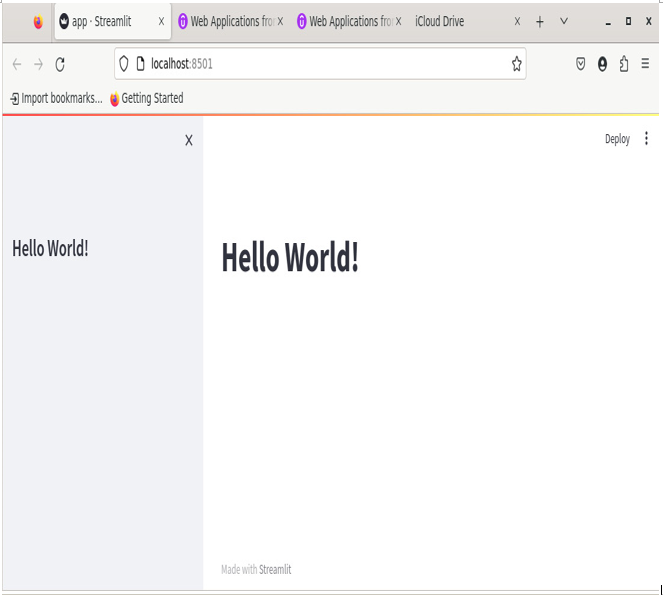
Figure 14.2: The starting web app
This is very simple: we get the same title in the sidebar and the main part of the web app. Taking a closer look, we can find some very interesting elements that can be customized:
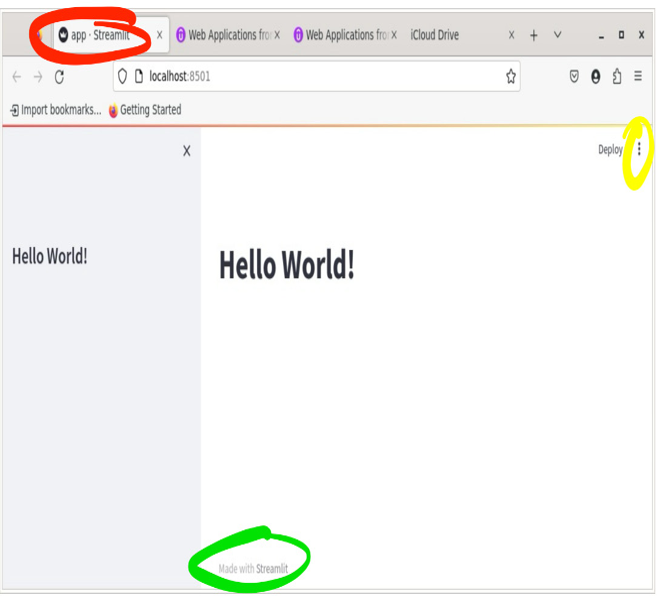
Figure 14.3: App title and icon, footer, and menu
In Figure 14.3, we have the following:
- In red, we can see the title and icon of our web application. At the moment, these are the default ones: Streamlit’s icon and our Python filename.
- In green, we can see the so-called footer.
- In yellow, we can see the three points menu. In previous versions of Streamlit, this was the so-called hamburger menu.
Let’s start from the three points menu and click on it. We’ll get the following pop-up menu:
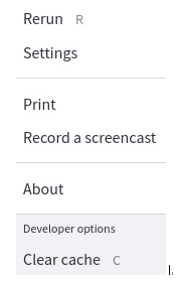
Figure 14.4: The “three points” menu
In this pop-up menu, there are several voices:
- Rerun, to rerun the web app after a change in the code
- Print, to print the screen
- Record a screencast, to record our web app
- Clear cache, to clear the cache with just one click
The other two voices, About and Settings, are very interesting because they can be customized, helping us in personalizing the look and feel of our application.
Let’s open Settings. We’ll get the following new window:
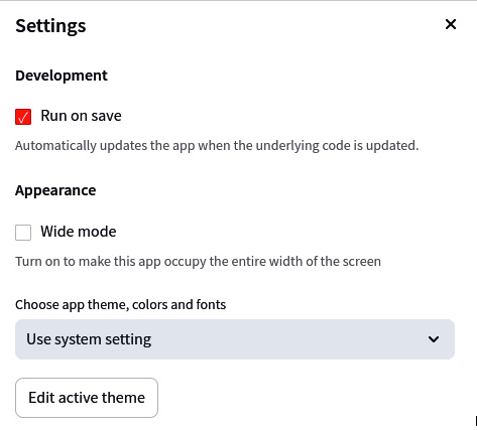
Figure 14.5: Settings
From this menu, we can automatically update the app when the underlying code is updated. We can also choose to run it in wide or normal mode and set the theme; this can be Light, Dark, or the same as our system’s settings (Use system setting).
The customization level is even deeper. In fact, by clicking on Edit active theme, we’ll see the following window:
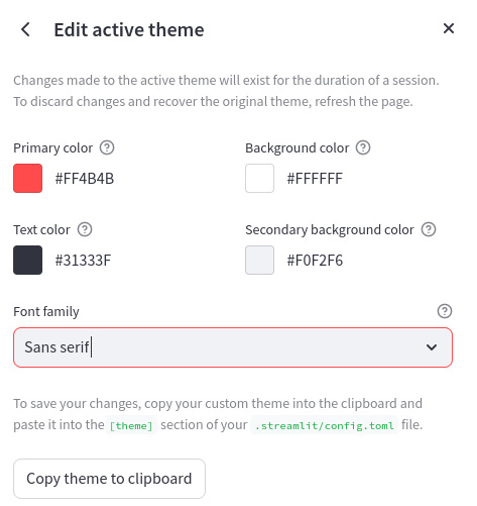
Figure 14.6: The Edit active theme window
From this window, we can customize the Primary color, Text color, Background color, and Secondary background color value. Moreover, we can select the font from a list, and we can copy the configuration to the clipboard.
As indicated in the note below the font selection, if we want to make these choices permanent, we must edit a file named config.toml in the .streamlit directory; it’s a hidden folder. We’ll take care of this file later, in the Understanding theming and .toml files section.
Now, it’s time to see how we can customize our pages.


